This article contains affiliate links. I actually purchased the RackNerd VPS used here and verified the WireGuard setup and connection myself.
Building a Personal WireGuard VPN on a RackNerd KVM VPS: Tested on macOS
I rented a small overseas VPS and turned it into a personal WireGuard VPN. This guide covers the exact path I used: RackNerd 1 GB KVM VPS, Ubuntu 24.04, SSH key authentication, disabling root/password SSH, UFW, WireGuard, and a macOS client. I also verified that my public IPv4 changed to the VPS address and that WireGuard handshakes and traffic were working.
Important: this does not make you “completely anonymous.” It creates an encrypted tunnel from your device to your VPS and changes the public IPv4 exit point. The VPS provider can still have account and connection records.
The VPS I used
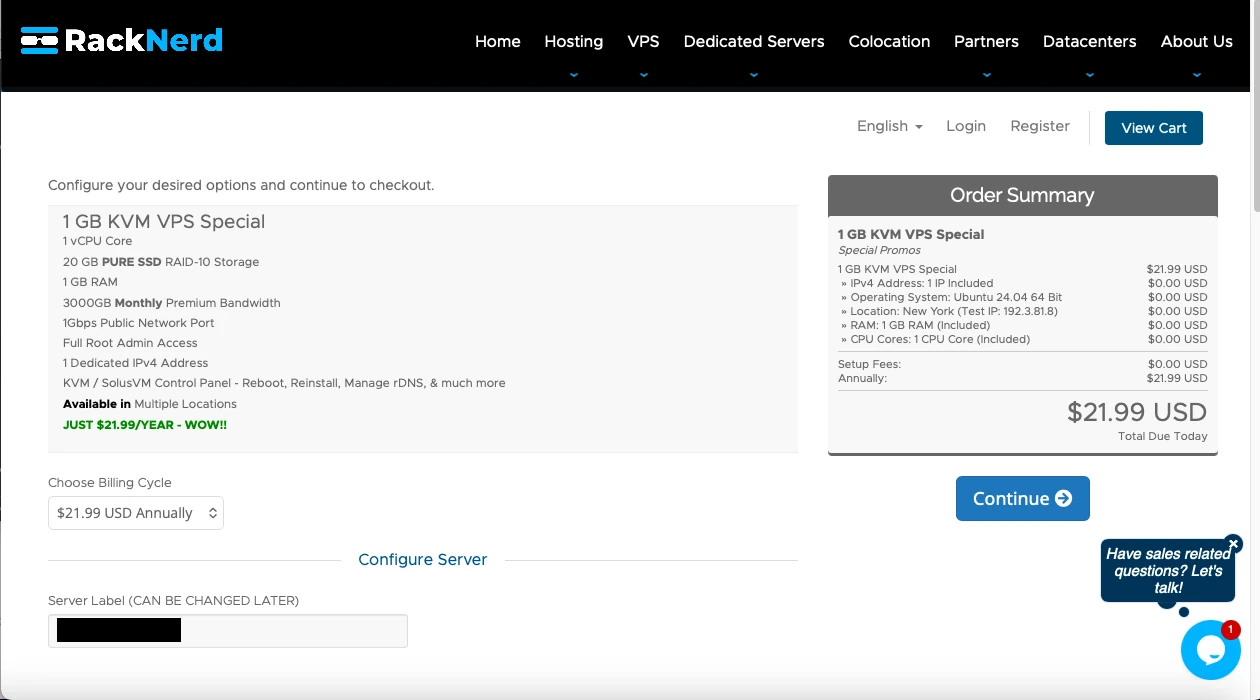
As of September 14, 2026, my order was a “1 GB KVM VPS Special” shown at $21.99 USD/year. Your final local-currency charge depends on exchange rates and card fees, and pricing, stock, and locations can change.
| CPU | 1 vCPU |
|---|---|
| RAM | 1 GB |
| Storage | 20 GB SSD |
| Monthly transfer | 3000 GB |
| Network | 1 Gbps public port |
| IPv4 | 1 dedicated IPv4 |
| Virtualization | KVM |
| Access | Full root access |
Check RackNerd
This is an affiliate link. If you purchase through it, this site may receive a commission. It does not mean the customer price is necessarily lower.
Why build my own VPN?
Commercial VPN apps are easier if you want one-click access to many countries. A self-hosted VPN is different: you control one server and one exit IP, but you also become responsible for updates, firewall rules, key management, and troubleshooting. I chose this route to learn how the pieces fit together and to have a dedicated VPN exit I control.
1. Boot the VPS and check the control panel
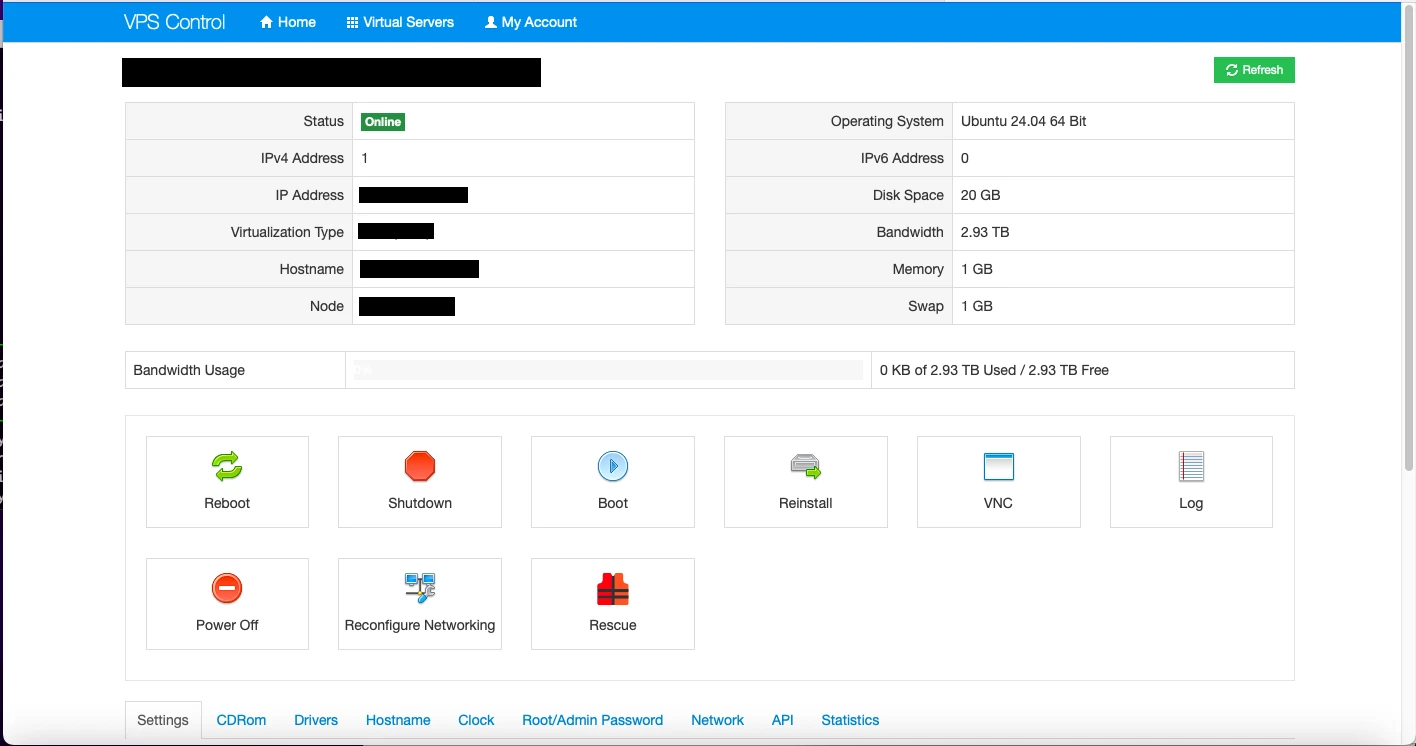
After ordering, RackNerd provided the VPS IP, root credentials, and NerdVM/SolusVM control-panel details. The panel showed Ubuntu 24.04 64-bit, 20 GB disk, 1 GB RAM, and the VPS online.
2. Connect from macOS and update Ubuntu
ssh root@YOUR_VPS_IPwhoami
hostname
cat /etc/os-release
ip addr
free -h
df -h
apt update
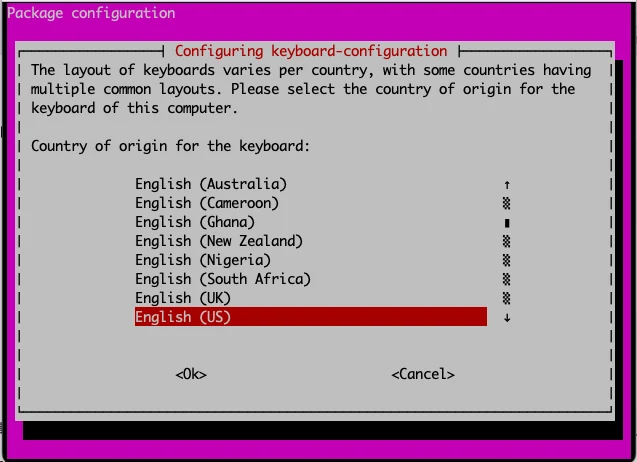
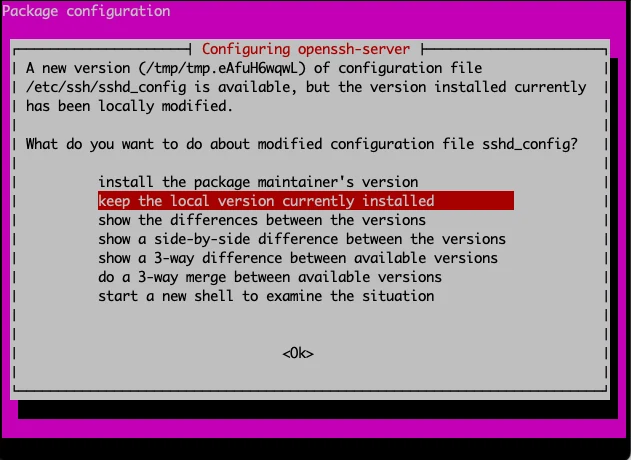
apt upgrade -yDuring the upgrade I kept the standard English (US) keyboard layout. When OpenSSH asked whether to replace a locally modified sshd_config, I kept the local version and hardened SSH myself afterwards.
reboot
# reconnect
uname -r
systemctl --failed
apt list --upgradable
My updated system reported Ubuntu 24.04.5 LTS, kernel 6.8.0-139-generic, no failed units, and no pending packages.
3. Create an admin user and switch to SSH keys
adduser vpnadmin
usermod -aG sudo vpnadmin
id vpnadmin
On the Mac:
ssh-keygen -t ed25519 -a 100 \
  -f ~/.ssh/racknerd_wireguard \
  -C "racknerd-wireguard"

scp ~/.ssh/racknerd_wireguard.pub \
  root@YOUR_VPS_IP:/tmp/racknerd_wireguard.pub
On the VPS:
install -d -m 700 -o vpnadmin -g vpnadmin /home/vpnadmin/.ssh
cat /tmp/racknerd_wireguard.pub > /home/vpnadmin/.ssh/authorized_keys
chown vpnadmin:vpnadmin /home/vpnadmin/.ssh/authorized_keys
chmod 600 /home/vpnadmin/.ssh/authorized_keys
rm /tmp/racknerd_wireguard.pub
ssh -i ~/.ssh/racknerd_wireguard vpnadmin@YOUR_VPS_IP
whoami
sudo whoamiI verified whoami → vpnadmin and sudo whoami → root before changing SSH authentication.
4. Disable root SSH and password authentication
In my image, /etc/ssh/sshd_config.d/50-cloud-init.conf explicitly enabled password authentication. I created an earlier drop-in file:
sudo nano /etc/ssh/sshd_config.d/00-racknerd-hardening.confPermitRootLogin no
PasswordAuthentication no
KbdInteractiveAuthentication no
PubkeyAuthentication yessudo sshd -t
sudo systemctl reload ssh
sudo sshd -T | grep -E \
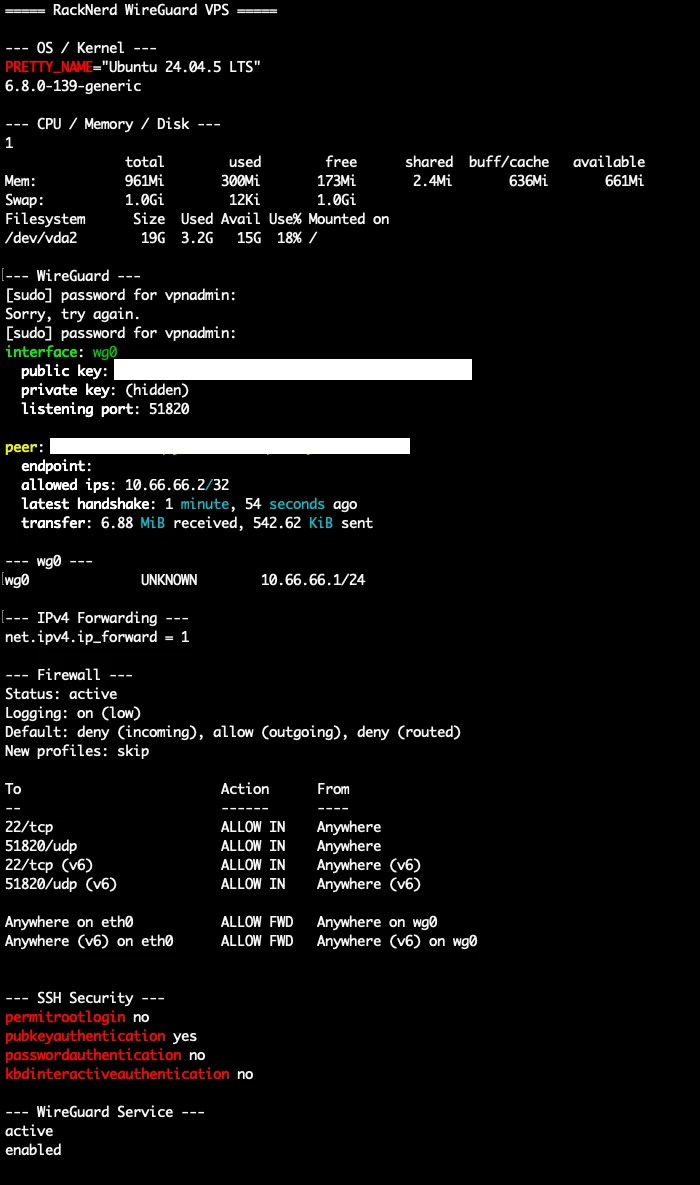
'permitrootlogin|passwordauthentication|pubkeyauthentication|kbdinteractiveauthentication'The effective result was root login disabled, public-key auth enabled, and password/keyboard-interactive auth disabled. Always verify a second key-based SSH session before closing the working session.
I also saw failed external login attempts against root in the SSH log while configuring the server. That does not mean the server was compromised, but it is a good reminder that public VPS addresses are scanned quickly.
5. Enable UFW
sudo ufw allow 22/tcp
sudo ufw allow 51820/udp
sudo ufw enable
sudo ufw status verbose
After enabling UFW, I opened another terminal and confirmed that SSH key login still worked.
6. Install WireGuard and enable IPv4 forwarding
sudo apt install -y wireguard
wg --version
sudo nano /etc/sysctl.d/99-wireguard-forward.confnet.ipv4.ip_forward=1sudo sysctl --system
sysctl net.ipv4.ip_forward
sudo ufw route allow in on wg0 out on eth07. Generate server keys and create wg0
sudo install -d -m 700 /etc/wireguard
sudo sh -c 'umask 077; wg genkey > /etc/wireguard/server_private.key'
sudo sh -c 'wg pubkey < /etc/wireguard/server_private.key > /etc/wireguard/server_public.key'
sudo bash -c 'umask 077
{
echo "[Interface]"
echo "Address = 10.66.66.1/24"
echo "ListenPort = 51820"
printf "PrivateKey = "
cat /etc/wireguard/server_private.key
echo "PostUp = iptables -t nat -A POSTROUTING -o eth0 -j MASQUERADE"
echo "PostDown = iptables -t nat -D POSTROUTING -o eth0 -j MASQUERADE"
} > /etc/wireguard/wg0.conf'
sudo chmod 600 /etc/wireguard/wg0.conf
sudo systemctl enable --now wg-quick@wg0I verified wg0 = 10.66.66.1/24, UDP 51820 listening, and an eth0 MASQUERADE rule.
8. Create the macOS client
mkdir -p ~/.wireguard
chmod 700 ~/.wireguard
umask 077
wg genkey | tee ~/.wireguard/mac_private.key | \
  wg pubkey > ~/.wireguard/mac_public.key
Add the Mac public key to the server:
[Peer]
PublicKey = MAC_PUBLIC_KEY
AllowedIPs = 10.66.66.2/32
sudo wg-quick strip wg0 | sudo wg syncconf wg0 /dev/stdinmacOS client configuration:
[Interface]
PrivateKey = MAC_PRIVATE_KEY
Address = 10.66.66.2/32
DNS = 1.1.1.1

[Peer]
PublicKey = SERVER_PUBLIC_KEY
Endpoint = YOUR_VPS_IP:51820
AllowedIPs = 0.0.0.0/0
PersistentKeepalive = 25
9. Real connection test
sudo wg-quick up ~/.wireguard/racknerd-us.conf
ping -c 4 10.66.66.1
curl -4 ifconfig.me
The tunnel responded to 4/4 pings with 0% packet loss. My route to the New York VPS was high-latency, averaging roughly 300 ms, so location and routing matter.
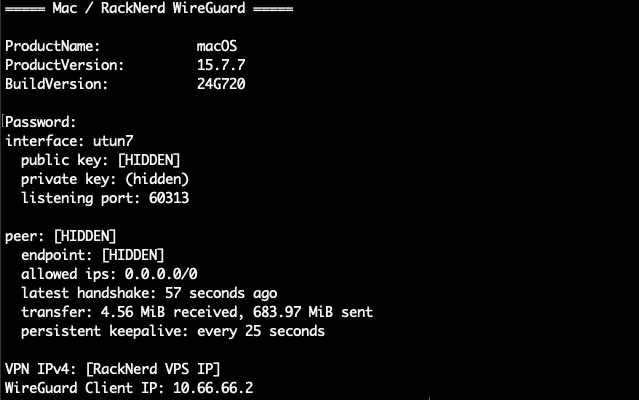
When I disabled the tunnel, curl -4 ifconfig.me showed my normal Japanese connection. After enabling WireGuard again, it showed the RackNerd VPS IPv4. On the VPS, sudo wg show displayed a recent handshake and transferred bytes.
10. IPv6 still needs separate handling
My client used AllowedIPs = 0.0.0.0/0, so the setup above is an IPv4 full tunnel only. A test with curl -6 ifconfig.me still returned an IPv6 address.
At the time of testing, another Japanese WireGuard VPN was also enabled in the macOS app, so I still need to isolate whether IPv6 was using the original connection or the other tunnel. For that reason, I describe this article as a verified IPv4 overseas-VPS tunnel, not a fully leak-proof VPN. A strict full-tunnel setup should additionally handle IPv6 routing/blocking and verify DNS paths.
What I liked and what to watch
| Pros | Things to consider |
|---|---|
| 1 GB / 1 vCPU was enough for this WireGuard use | The VPS is unmanaged: you maintain it |
| A dedicated IPv4 exit you control | Not a replacement for a multi-country commercial VPN app |
| Full control over SSH, firewall, and WireGuard | You are responsible for keys and backups |
| I started this test at $21.99/year | Latency depends heavily on location and routing |
| Public IPv4 change and handshakes verified | IPv6 and DNS need separate verification |
Who this is for
- People who want to learn Linux, SSH, and WireGuard hands-on
- People who want one dedicated overseas IPv4 exit
- People comfortable managing their own server security
- People looking for a small, inexpensive VPS for experimentation
If you want effortless country switching, a polished app, or managed support, a commercial VPN service is usually a better fit.
Check the terms
RackNerd VPS services are unmanaged by default, so OS, firewall, applications, data, and backups are your responsibility. Illegal activity, spam, brute-force attacks, outbound DDoS, and other abusive use are prohibited. If your planned use is unclear, ask RackNerd before ordering.
Conclusion
I successfully turned a RackNerd 1 GB KVM VPS into a WireGuard VPN and verified macOS → VPS → Internet over IPv4. The setup is light enough for this small VPS, but a production-quality “all traffic” VPN still requires explicit IPv6 and DNS verification.
The RackNerd VPS used in this test
Check current pricing, stock, and locations on the official site. The following is an affiliate link.